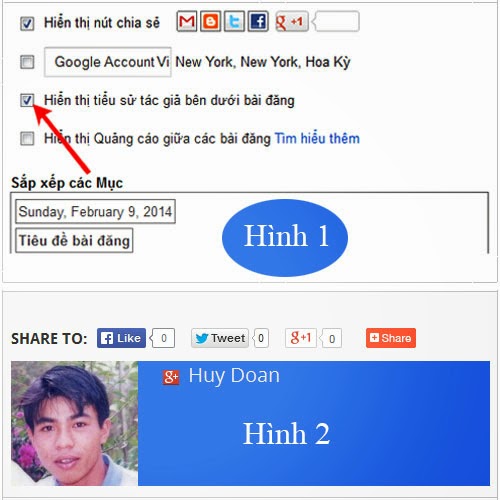
<data:post.authorPhoto.url/> và <data:post.authorAboutMe/> chính là url ảnh đại diện và thông tin giới thiệu về người viết bài được lấy từ Blogger profile hoặc Google profile.Đầu tiên là bật chức năng xem thông tin người viết bài: Bạn vào bố cục, chọn chỉnh sửa widget Blog Posts và tích chọn vào nút Hiển thị tiểu sử tác giả bên dưới bài đăng. (Hình 1)
Bước 2: Bạn vào phần chỉnh sửa html trong template của bạn, di chuyển xuống tìm thẻ <div class='post-footer'> Thông thường thì bên trong thẻ post footer có 3 thẻ:
<div class="post-footer-line post-footer-line-1">1</div>
<div class="post-footer-line post-footer-line-2">Cho code vào đây</div>
<div class="post-footer-line post-footer-line-3">3</div>
Bạn thêm code bên khung dưới đây vào thẻ thứ 2.
<b:if cond='data:blog.pageType == "item"'>
<style type="text/css">
.author-box{margin:10px 0;background:#357ae8}.author-avatar{float:left;width:20%;height:auto}.author-info{float:left;padding-left:4%;width:75%}.author-name{padding-left:25px;color:#eee!important}.author-name h3{display:inline;margin:0;padding:0;font-size:20px}.author-about{margin:0;padding:10px 0;color:#000!important}
</style>
<div class='author-box'>
<img alt='<data:post.author/>' class='author-avatar' src='<b:if cond='data:post.authorPhoto.url'><data:post.authorPhoto.url/><b:else/>https://lh3.googleusercontent.com/uFp_tsTJboUY7kue5XAsGA=s96</b:if>' title='<data:post.author/>'/>
<div class='author-info'>
<a class='author-name' style='background:left no-repeat url(<b:if cond='data:post.authorProfileUrl'>http://www.google.com/images/icons/ui/gprofile_button-16.png)' href='<data:post.authorProfileUrl/><b:else/>http://www.blogger.com/img/logo-16.png)' href='<data:post.authorUrl/></b:if>' rel='author' target='_blank' title='<data:top.authorLabel/>&nbsp;<data:post.author/>'><h3><data:post.author/></h3></a>
<b:if cond='data:post.authorAboutMe'>
<p class='author-about'><data:post.authorAboutMe/></p>
</b:if>
</div>
<div style='clear:both'/>
</div>
</b:if>Trong đó dấu < và > là để thay cho dấu < và >, đây là phương pháp rút gọn code, tag <b:if> đặt được vào trong tag <img> nhờ đó code trở nên ngắn gọn hơn. Xong rồi bây giờ bạn sẽ có được kết quả như (Hình 2)


0 blogger-facebook: